How to Cut & Secure Geotextile Cloth for Uneven Terrain (Slopes, Curves, Trenches)
Uneven terrain such as slopes, curves, and trenches poses extraordinary challenges when working with Geotextile Cloth. Whether you’re mission a landscaping project, erosion control, or civil engineering work, suitable cutting and securement of geo fabric cloth are critical to making positive its effectiveness in soil stabilization, drainage improvement, and slope protection. Incorrect set up can lead to material shifting, tearing, or failure to prevent erosion—compromising the complete project’s integrity. In this guide, we’ll destroy down the imperative steps for lowering and securing Geotextile Cloth on uneven terrain, protecting key troubles for slopes, curves, and trenches, and highlighting best practices to maximize sturdiness and performance.
")
1. Pre-Installation Preparation: Assess Terrain & Select the Right Geotextile Cloth
Before you start cutting or securing any geo fabric cloth, thorough pre-installation training is non-negotiable—especially on uneven terrain. This part lays the groundwork for a handy set up and ensures that your Geotextile Cloth is tailored to the special desires of slopes, curves, or trenches. Skipping these steps can give up end result in ill-fitting fabric, inadequate securement, and premature wear.
1.1 Assess Terrain Conditions & Measure Accurately
First, habits a unique assessment of the uneven area. For slopes, be conscious the gradient (steepness), soil variety (sandy, clay, or rocky), and any current vegetation or debris. For curves—such as spherical panorama components or utility lines—map the contour to find out tight bends or gradual arcs. For trenches, measure the depth, width, and any irregularities in the trench walls. This assessment helps you figure out how an lousy lot Geotextile Cloth you’ll need, as properly as the area to make strategic cuts for a blissful fit.
When measuring, continuously add a 10-15% overhang to your calculations. This larger material payments for terrain irregularities, overlapping seams (critical for erosion control), and manageable stretching of the geo material cloth. For example, a 5-meter slope with a 30-degree gradient will require more cloth than a flat flooring of the equal horizontal length—accounting for the slope’s diagonal measurement and overhang at the pinnacle and bottom.
")
1.2 Choose the Correct Geotextile Cloth Type
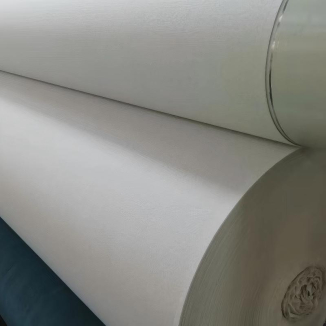
Not all Geotextile Cloth is designed for uneven terrain. For slopes, curves, and trenches, prioritize non-woven or woven geotextiles that grant immoderate tensile electrical energy and flexibility. Non-woven geotextiles are fantastic for drainage and erosion manipulate on slopes, as they conform top to irregular surfaces and promote water filtration. Woven geotextiles, on the distinct hand, supply most positive strength for stabilizing trenches or steep slopes the vicinity soil stress is high. For geotextile slope security specifically, show up for merchandise labeled “erosion control” or “slope stabilization” to make positive they can face up to the lateral forces of sloped terrain.
Additionally, assume about the fabric’s weight (measured in grams per rectangular meter, gsm). Heavier cloth (200+ gsm) are greater suited for steep slopes or high-traffic areas, while lighter cloth (100-150 gsm) work for slight curves or shallow trenches. Always check the manufacturer’s specs to confirm the cloth is rated for your project’s terrain and supposed use.
1.3 Prepare the Terrain for Installation
Even the high-quality Geotextile Cloth will fail if set up on unstable or debris-covered terrain. Clear the region of rocks, roots, sharp objects, and vegetation—these can puncture or tear the cloth over time. For slopes, grade the ground to create a smooth, even base (where possible) to reduce stress on the geo fabric cloth. For trenches, make positive the partitions are impenetrable and free of loose soil; you can also moreover desire to shore up trench partitions with quick helps before than inserting in the fabric. If the soil is mostly rocky, assume about together with a skinny layer of sand or top notch soil as a buffer between the terrain and the Geotextile Cloth to quit abrasion.
")
2. Precision Cutting Techniques for Slopes, Curves, and Trenches
Cutting Geotextile Cloth for uneven terrain requires precision—too small, and the fabric won’t cowl the area adequately; too large, and more fabric can bunch up, most important to gaps or prone points. The purpose is to limit the fabric to comply with the terrain’s contours at the same time as conserving adequate overlap for impervious seams. Below are terrain-specific cutting strategies to make positive a high-quality fit.
2.1 Cutting Geotextile Cloth for Slopes
Slopes require long, continuous parts of Geotextile Cloth to maintain away from daily seams, which are manageable susceptible points. Start by measuring the slope’s measurement (from pinnacle to bottom) and width. Cut the cloth into rectangular strips that swimsuit the slope’s length, which include the 10-15% overhang at the pinnacle and bottom. For steep slopes (greater than 30 degrees), limit the strips barely wider than the slope’s width to allow for a tighter in structure in opposition to the soil.
When cutting, use sharp utility knives or cloth shears—dull tools can fray the edges of the geo cloth cloth, lowering its strength. Lay the material flat on a convenient flooring before than cutting, and use a straightedge to make positive straight, even cuts. If the slope has irregularities (such as bumps or depressions), make small, strategic notches in the cloth to allow it to conform to the terrain barring stretching or tearing. Avoid making big cuts or gaps, as these will compromise the fabric’s functionality to give up erosion.
")
2.2 Cutting Geotextile Cloth for Curves
Curves (such as spherical trees, flower beds, or utility poles) require more precise cutting to make certain the material fits snugly barring bunching. Start through way of tracing the curve onto the Geotextile Cloth the use of a chalk line or marker. For gradual curves, limit the cloth in a smooth, continuous arc. For tight curves (less than 1 meter in radius), make small, evenly spaced slits alongside the inner factor of the curve. These slits allow the cloth to fold and conform to the curve barring stretching.
When cutting for curves, constantly go away a small overhang (5-10 cm) to make positive full coverage. Avoid pulling or stretching the fabric at the same time as cutting, as this can distort the structure and lead to an ill-fitting installation. After cutting, take a seem at the fabric toward the curve to make positive it suits properly—adjust the cuts as desired formerly than securing.
2.3 Cutting Geotextile Cloth for Trenches
Trenches modern-day a different venture due to the truth the Geotextile Cloth ought to cowl the trench bottom and walls. Start via way of measuring the trench’s length, width, and depth. Calculate the material dimension via together with twice the depth (for the two walls) plus the width (for the bottom) plus the 10-15% overhang at every ends. For example, a trench that is 10 meters long, 1 meter wide, and half meters deep will require material strips that are 10 meters prolonged and (2*0.5 + 1) = two meters massive (plus overhang).
Cut the material into strips of the calculated size. For trenches with irregular partitions (e.g., uneven depth or width), make notches alongside the edges of the material to allow it to in structure the trench’s contours. For sharp corners at the bottom of the trench, make small cuts to fold the fabric neatly barring creasing or tearing. Ensure the material covers the entire trench bottom and extends up the partitions to the trench edges—this prevents soil from seeping underneath the fabric and inflicting erosion.
")
3. Securement Methods for Uneven Terrain: Keep Geotextile Cloth in Place
Proper securement is absolutely as crucial as special reducing when working with Geotextile Cloth on slopes, curves, or trenches. Uneven terrain matters the material to lateral forces (on slopes), nervousness (on curves), and soil stress (in trenches)—so the desirable securement method is quintessential to prevent transferring or tearing. Below are examined securement techniques for each and every terrain type, with a core of interest on maximizing stability for geotextile slope protection and unique applications.
3.1 Securing Geotextile Cloth on Slopes
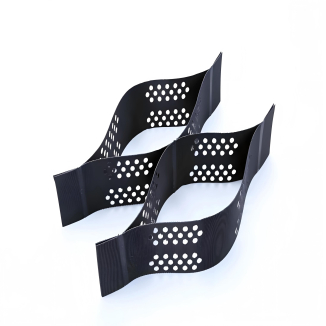
Slopes are prone to fabric transferring due to gravity, water runoff, and soil movement—so securement have to be strong and evenly distributed. The most satisfactory method for securing Geotextile Cloth on slopes is the use of anchor pins (also referred to as staples or pegs) and overlapping seams. Start with the aid of the usage of laying the first strip of material at the bottom of the slope, making positive it extends 10-15 cm past the slope’s base (the overhang). Secure the bottom side with anchor pins spaced 30-50 cm apart, driving them at a 45-degree point of view into the soil for most hold.
Next, lay the subsequent strip of geo fabric material on pinnacle of the first, overlapping the seams through the usage of 15-30 cm (wider overlaps for steeper slopes). Secure the overlap with anchor pins spaced 30 cm apart alongside the seam. Continue this manner up the slope, making positive each subsequent strip overlaps the one underneath it. For steep slopes (greater than forty 5 degrees), add more anchor pins alongside the fabric’s edges and core to distribute nervousness evenly. You can moreover use gravel or soil to weigh down the pinnacle side of the material (called “ballasting”) for higher stability—this is in particular recommended for geotextile slope protection in areas with heavy rainfall.
")
3.2 Securing Geotextile Cloth on Curves
Curves require securement that follows the contour to stop the cloth from pulling away from the terrain. Use anchor pins spaced 20-30 cm apart alongside the outer aspect of the curve—this is the area the material is most maybe to pull taut. For the inside facet of the curve (where the fabric is folded), impenetrable the folds with anchor pins to keep them in place. Avoid over-securing the inner edge, as this can create creases that weaken the fabric.
For curves spherical panorama aspects (e.g., trees), wrap the Geotextile Cloth spherical the attribute and tightly closed it with anchor pins on every sides. Leave a small gap (2-3 cm) between the material and the characteristic to allow for increase (if it’s a tree) or movement (if it’s a utility pole). Overlap the material seams alongside the curve, securing each and every overlap with anchor pins. This ensures a continuous barrier that prevents soil erosion spherical the curve.
3.3 Securing Geotextile Cloth in Trenches
Trenches require securement that continues the cloth pressed in opposition to the bottom and walls, even beneath soil pressure. Start by means of the usage of laying the fabric in the trench, making positive it covers the bottom and extends up the partitions to the trench edges. Secure the pinnacle edges of the fabric to the flooring outdoor the trench with anchor pins spaced 30-40 cm apart. For the trench bottom, use anchor pins spaced 50-60 cm apart to keep the material flat and cease it from transferring when soil or gravel is added.
If the trench is deep (greater than 1 meter) or has unstable walls, use greater securement techniques such as soil nails or trees stakes alongside the trench walls. Drive the stakes into the trench partitions at a 45-degree angle, then join the Geotextile Cloth to the stakes the use of zip ties or heavy-duty string. This prevents the fabric from being pulled away from the partitions by using way of soil pressure. For trenches that will be stuffed with gravel or aggregate, the fill material will moreover help impenetrable the fabric—ensure the fill is delivered evenly to maintain away from transferring the fabric.
")
3.4 Post-Securement Checks & Maintenance
After securing the Geotextile Cloth, habits a thorough inspection to make positive there are no gaps, free areas, or tears. For slopes, check that the fabric is taut on the other hand now no longer stretched too tightly—overstretching can lead to tearing over time. For curves, make sure the fabric fits snugly without bunching. For trenches, confirm that the cloth covers the entire bottom and partitions and that the pinnacle edges are securely anchored.
Regular maintenance is moreover integral to preserve the fabric’s effectiveness. Inspect the Geotextile Cloth periodically for signs of damage (tears, fraying, or shifting) and repair any troubles promptly. For geotextile slope protection, clear particles or vegetation that accumulates on the fabric—this can entice water and weigh down the fabric. If the fabric turns into loose, add greater anchor pins or ballast to re-secure it.
")
Final Tips for Success with Geotextile Cloth on Uneven Terrain
Working with Geotextile Cloth on slopes, curves, and trenches requires persistence and precision, alternatively following these steps will make positive a profitable installation. Remember to: 1) Choose the suitable geo material cloth for your terrain and project; 2) Measure and decrease with precision, such as ample overhang for irregularities; 3) Use terrain-specific securement strategies to retain the fabric in place; and 4) Conduct ordinary inspections and maintenance.
By correct cutting and securing Geotextile Cloth, you’ll maximize its effectiveness in soil stabilization, erosion control, and geotextile slope protection—ensuring your venture stands the test of time. Whether you’re a DIY fanatic or a professional contractor, these first-rate practices will aid you tackle uneven terrain with confidence.
Contact Us
Company Name: Shandong Chuangwei New Materials Co., LTD
Contact Person :Jaden Sylvan
Contact Number :+86 19305485668
WhatsApp:+86 19305485668
Enterprise Email: cggeosynthetics@gmail.com
Enterprise Address: Entrepreneurship Park, Dayue District, Tai 'an City,
Shandong Province