HDPE Geomembrane Installation Best Practices: A Step-by-Step Guide
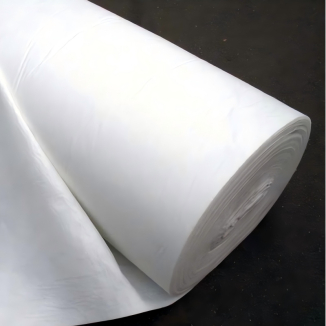
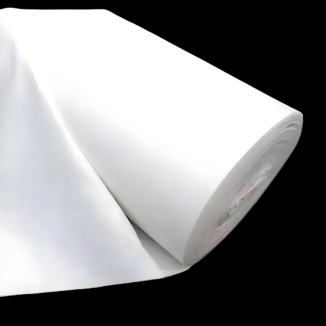
Installing hdpe geomembrane efficiently is the cornerstone of advantageous containment systems—whether for wastewater lagoons, landfills, irrigation ponds, or industrial storage. As an impermeable geomembrane, its overall performance hinges on particular installation; even minor blunders can lead to leaks, environmental risks, and expensive repairs. Geomembrana in hdpe (HDPE geomembrane) is a durable, versatile material, however its full conceivable is solely realized when established following enterprise pleasant practices. This step-by-step information breaks down the imperative phases of HDPE geomembrane installation, from pre-installation planning to post-installation inspection, making sure your mission achieves most impermeability, longevity, and compliance with protection standards.

Pre-Installation Planning: Lay the Groundwork for Success
Before unrolling a single sheet of hdpe geomembrane, thorough planning prevents high priced mistakes. This section focuses on perception challenge requirements, assessing web page conditions, and gathering the proper equipment and materials.
1. Project Assessment & Material Selection
Start by way of defining the project’s goals: Is the impermeable geomembrane for containment, waterproofing, or erosion control? Consider environmental elements like temperature fluctuations, chemical exposure, and soil type—these have an effect on the thickness and grade of geomembrana in hdpe needed. For example, harsh chemical environments require HDPE with more suitable chemical resistance, whilst bloodless climates demand fabric formulated to face up to brittleness. Consult with producers to pick the splendid HDPE geomembrane specifications, making sure it meets nearby regulatory standards.
2. Site Evaluation & Preparation Checklist
Inspect the web page to discover conceivable obstacles: rocks, roots, debris, or uneven terrain can puncture the geomembrane. Mark utility traces and underground buildings to keep away from harm throughout excavation. Create a precise website sketch that includes:
Slope gradients (HDPE geomembrane performs first-rate on slopes with gradients ≤3:1)Anchoring areas (for securing the geomembrane edges)Drainage paths (to forestall water pooling underneath the liner)Access factors for tools and workers
3. Tool & Team Preparation
Gather specialised equipment for HDPE geomembrane installation: warmness fusion welders (hot wedge or extrusion), vacuum testers, utility knives, seam rollers, and measuring tapes. Ensure all tools is calibrated and in suitable working order—faulty welders are a main reason of seam failure. Train the set up group on protection protocols and appropriate welding techniques; certification in hdpe geomembrane set up is encouraged for key personnel.

Step 1: Site Preparation – Create a Smooth, Stable Base
A clean, compacted base is integral for stopping impermeable geomembrane injury and making sure uniform installation.
Begin by way of clearing the website online of all vegetation, rocks, and debris. Remove sharp objects (e.g., glass, metal) that ought to puncture the geomembrane. Grade the soil to gain the preferred slope and contour, then compact it the use of a vibratory curler or plate compactor. For uneven or rocky soil, installation a non-woven geotextile underlay—this acts as a cushion, defending the geomembrana in hdpe from abrasion and punctures. The underlay must lengthen past the geomembrane edges by means of at least 30 cm to make certain full coverage.
Step 2: Unrolling & Positioning HDPE Geomembrane
Proper unrolling and positioning limit wrinkles, make sure suitable seam alignment, and limit the want for immoderate cutting.
Unroll the hdpe geomembrane rolls parallel to the site’s longest dimension to decrease the wide variety of seams. Roll out the cloth on a calm day to keep away from wind damage—secure free edges with sandbags or anchor pins if wind is a concern. Allow the geomembrane to "relax" for numerous hours (or overnight) after unrolling; this reduces anxiety and prevents shrinkage after installation. Align the sheets to overlap at seams with the aid of 15–30 cm (the genuine overlap relies upon on the welding approach and producer recommendations). Avoid dragging the geomembrane throughout the ground, as this can tear the cloth or injury the underlay.

Step 3: Seam Welding – The Critical Step for Impermeability
Seams are the most susceptible phase of any impermeable geomembrane system. Proper warmth fusion welding creates a molecular bond that’s as sturdy as the geomembrane itself.
1. Choose the Right Welding Method
Two important strategies are used for hdpe geomembrane welding:
Hot Wedge Welding: Ideal for flat surfaces and straight seams. A heated wedge melts the overlapping geomembrane layers, whilst strain rollers bond them together. This technique is quick and appropriate for most residential and industrial projects.Extrusion Welding: Used for complicated seams (e.g., corners, curves) or thick geomembranes. A welding gun extrudes molten HDPE into the seam, growing a sturdy bond. This technique is favored for high-pressure containment systems.
2. Welding Preparation & Execution
Clean the seam location with a lint-free fabric to get rid of dirt, oil, or moisture—contaminants forestall ideal bonding. Set the welder to the manufacturer’s endorsed temperature and velocity (typically 180–220°C for HDPE). Test the weld on a scrap piece of geomembrana in hdpe to make sure the bond is sturdy (a "peel test" need to disclose cohesive failure, the place the geomembrane tears alternatively than the seam separating). Weld the seams in a continuous, consistent motion, retaining the welder aligned to hold uniform overlap. Use a seam curler at once after welding to put off air bubbles and make certain full contact between layers.

Step 4: Seam Testing – Verify Impermeability
No hdpe geomembrane set up is whole besides rigorous seam testing. This step ensures no leaks exist earlier than the machine is put into use.
Common seam trying out techniques include:
Vacuum Testing: Place a vacuum field over the seam and practice poor pressure. If the vacuum holds (no drop in pressure), the seam is leak-free. This approach is used for warm wedge welds.
Air Pressure Testing: Seal the ends of a seam and inject compressed air. Monitor the pressure—no stress loss shows a sound seam. This is best for extrusion welds.
Spark Testing: For thick geomembranes, a high-voltage spark tester is used to realize pinholes or skinny spots in the material.
Repair any failed seams immediately: reduce out the faulty section, easy the area, and re-weld. Retest the repaired seam to affirm it meets standards.
Step 5: Anchoring & Edge Protection
Securing the impermeable geomembrane edges prevents shifting, wind uplift, and harm from exterior forces.
Anchor the geomembrane the usage of anchor trenches: dig a trench (30–60 cm deep) alongside the site’s perimeter, location the geomembrane area into the trench, and backfill with compacted soil or concrete. For slopes or expanded edges, use anchor pins or concrete curbs to invulnerable the material. Install aspect safety (e.g., rock riprap, bushes edging) to protect the geomembrane from injury via equipment, wildlife, or UV exposure. Ensure the safety extends at least 15 cm above the geomembrane area to stop water from seeping below the liner.

Step 6: Post-Installation Inspection & Maintenance
Regular inspection and preservation prolong the lifespan of geomembrana in hdpe and make sure ongoing performance.
After installation, habits a closing walkthrough to test for:
Loose seams or unanchored edgesPunctures or tears from equipmentDebris on the geomembrane surface
Establish a upkeep schedule: check out the geomembrane quarterly for damage, specifically after extreme climate (e.g., storms, floods). Clean the floor generally to do away with particles that ought to reason abrasion. Repair small punctures with HDPE patches and warmness fusion; for massive damage, seek advice from a expert installer. Avoid dragging heavy tools throughout the geomembrane, and hinder get entry to to the vicinity to stop unintended damage.

Conclusion: Mastering HDPE Geomembrane Installation for Long-Term Success
Proper set up of hdpe geomembrane is a aggregate of cautious planning, unique execution, and rigorous testing. By following these satisfactory practices, you make certain your impermeable geomembrane promises most containment performance, environmental protection, and longevity. Geomembrana in hdpe is a durable, reasonable solution—but its effectiveness relies upon completely on how it’s installed.
Whether you’re putting in a liner for a wastewater pond, landfill, or irrigation system, investing time in appropriate installation can pay off. It reduces the danger of leaks, avoids regulatory penalties, and minimizes long-term preservation costs. For complicated tasks or if you’re undecided about any step, companion with skilled hdpe geomembrane installers—their knowledge ensures your challenge meets the perfect requirements of best and safety. With the proper approach, your HDPE geomembrane gadget will guard your venture and the surroundings for a long time to come.
Contact Us
Company Name: Shandong Chuangwei New Materials Co., LTD
Contact Person :Jaden Sylvan
Contact Number :+86 19305485668
WhatsApp:+86 19305485668
Enterprise Email: cggeosynthetics@gmail.com
Enterprise Address: Entrepreneurship Park, Dayue District, Tai 'an City,
Shandong Province