A Step-by-Step Guide to Installing Composite Geotextiles for Optimal Performance
Composite geotextiles are engineered marvels, combining the separation and reinforcement of a fashionable geotextile with the barrier characteristic of an impermeable layer. This fusion creates a geotextile impermeable membrane that is integral for cutting-edge civil and environmental projects. When established correctly, a composite geotextile affords a robust, long-lasting answer for containment, drainage, and stabilization. This information walks you thru the imperative steps for set up to make sure you reap the layout overall performance and toughness your challenge demands.

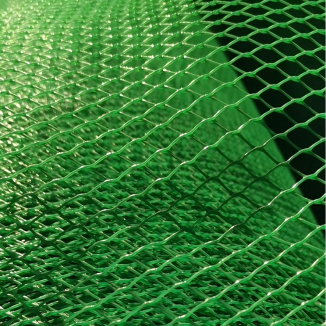
Understanding Your Composite Geotextile Material
Before set up begins, a thorough appreciation of the cloth is paramount. A composite geotextile is exactly as its identify suggests: a composite. Typically, it consists of a geotextile (often non-woven) thermally or adhesively bonded to a geomembrane (like HDPE or LLDPE), growing a singular impermeable geotextile product. The geotextile factor presents puncture protection, drainage, and friction, whilst the geomembrane core promises the indispensable hydraulic barrier.
Key pre-installation steps include:
●Material Verification: Confirm the delivered roll fits the assignment specs for weight, thickness, and polymer type.
●Site and Subgrade Preparation: The success of the complete set up hinges on a desirable organized subgrade. It should be smooth, compacted, and free of sharp rocks, debris, or vegetation that ought to puncture the geotextile impermeable membrane.
●Tool and Equipment Readiness: Have all critical equipment on-site, along with spreader bars for roll handling, welding gear (for seams), and sufficient ballast materials.
Step 1: Comprehensive Subgrade Preparation
The basis for any composite geotextile is the subgrade. An improperly organized base is the main reason of untimely failure.
Clear and Grade: Remove all obstructions. Grade the place to the designed contours to make certain desirable drainage and keep away from water pooling on or towards the set up liner.
Compact and Smooth: Achieve the required compaction density. The floor must be uniformly smooth. A frequent specification is that no particles large than 1/4 inch must protrude from the compacted surface. This meticulous training prevents stress factors and punctures in the impermeable geotextile layer.
Final Inspection: Conduct a walk-over inspection at once earlier than unrolling the material. This closing take a look at is fundamental for figuring out any last-minute hazards.

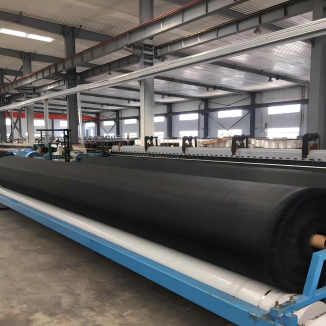
Step 2: Strategic Panel Layout and Roll Deployment
Planning the plan minimizes waste and ensures seams are efficiently positioned.
Create a Layout Plan: Map out the orientation and sequencing of rolls. Position seams to run parallel to slopes, now not down the fall line, anywhere possible. Plan for anchor trenches at the perimeter.
Handle Rolls with Care: Always use encouraged lifting strategies (e.g., spreader bars via the core) to keep away from unfavorable the roll ends or crushing the core. Do now not drag rolls throughout the ground.
Unroll the Material: Unroll the composite geotextile easily and loosely over the organized subgrade. Allow it to loosen up and acclimate to ambient temperatures, which is mainly necessary for thermal scanning. Avoid stretching or pulling the fabric taut, as this can reason stress.
Step 3: Precision Scanning and Seaming Techniques
Creating continuous, watertight seams is the most quintessential segment of putting in a geotextile impermeable membrane. There are two principal methods, regularly used in mixture on a single project.
Thermal Fusion Scanning (Dual or Extrusion): This approach makes use of warmness to soften the geomembrane core, fusing panels together.
Dual Hot Wedge: A warm wedge passes between two overlapped sheets, melting them. A curler then applies stress to create a non-stop double seam with an air channel for exceptional testing.
Extrusion Scanning: A ribbon of molten polymer is extruded between or on pinnacle of two overlapped sheets, bonding them as it cools. This approach is fantastically superb for difficult stipulations or special patches.
Chemical or Bodied Solvent Seaming: For some polymers, a chemical adhesive can be used to create a bond with the aid of softening the mating surfaces.
Seam Preparation: All seams have to be clean, dry, and free of wrinkles. Overlap widths need to strictly adhere to producer and graph specifications.

Step 4: Rigorous Seam Testing and Quality Assurance
Every inch of each seam ought to be examined to make certain the integrity of the impermeable geotextile barrier.
Non-Destructive Testing (NDT): This is carried out on one hundred percent of the seam length.
Air Channel Testing (for twin seams): Pressurize the air channel between the two weld tracks. A loss of stress suggests a leak that should be repaired.
Ultrasonic or Vacuum Testing: For different seam types, ultrasonic testers or vacuum packing containers are used to observe discontinuities.
Destructive Testing: Sample coupons are reduce from the ends of manufacturing seams at everyday intervals (e.g., each five hundred feet). These coupons are examined in a lab for shear and peel electricity to affirm the seaming technique parameters are correct.
Step 5: Anchoring, Termination, and Protection
Once the discipline is blanketed and seamed, the composite geotextile need to be securely anchored and protected.
Place Anchor Trenches: Excavate a trench alongside the perimeter. Place the liner into the trench, backfill, and compact. This secures the complete machine towards wind uplift and movement.
Apply Protective Cover: In many applications, the geotextile impermeable membrane requires a shielding soil cover. This cowl should be utilized cautiously to keep away from damage.
●Use firstly thin, easy carry layers.
●Place fabric from the toe of slopes upward.
●Never drop cowl fabric from a big peak at once onto the uncovered liner. The geotextile facet of the composite offers inherent puncture protection, however warning is nevertheless required.

Step 6: Final Inspection and Documentation
A formal mission closeout ensures accountability and gives a file for future reference.
Walk Final Inspection: Inspect the complete hooked up vicinity for seen damage, wrinkles, or careworn areas.
As-Built Documentation: Create targeted drawings noting panel locations, seam locations, check results, and any restore areas. This "as-built" document is valuable for upkeep and first-class assurance.
Repair Protocols: Have a licensed restore protocol ready. Any recognized flaw need to be repaired the use of an authorized patch that extends past the broken area, observed by using complete retesting.
By following this detailed, step-by-step guide, contractors and engineers can maximize the overall performance and carrier existence of their composite geotextile installation. The key to success lies in meticulous preparation, precision in the course of the imperative seaming process, and unwavering dedication to best manipulate at each stage. A top established impermeable geotextile machine is a durable, dependable asset that will operate its containment, separation, and reinforcement features for decades.
Contact Us
Company Name: Shandong Chuangwei New Materials Co., LTD
Contact Person :Jaden Sylvan
Contact Number :+86 19305485668
WhatsApp:+86 19305485668
Enterprise Email: cggeosynthetics@gmail.com
Enterprise Address: Entrepreneurship Park, Dayue District, Tai 'an City,
Shandong Province