How to Install Woven Geotextile for Road Base Stabilization: Step-by-Step Guide
Building a long lasting avenue base requires extra than simply dumping gravel over soil. Without desirable separation and reinforcement, the subgrade mixes with aggregate, main to rutting, pumping, and untimely failure. One of the most dependable options is woven kind geotextile, a high-strength cloth that stabilizes vulnerable soils and distributes visitors loads. This step-by-step information covers the whole thing from web page coaching to ultimate compaction, highlighting the function of woven polypropylene geotextile and explaining how a Drainage System Woven Geotextile additionally manages water. Follow these directions to make certain your street base performs for decades.

Why Woven Geotextile Is Essential for Road Base Stabilization
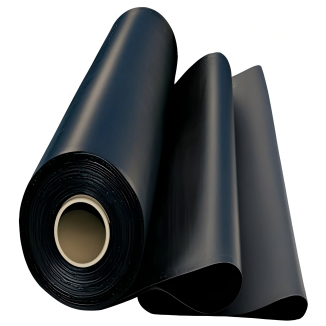
Before installing, it helps to recognize the material. Woven kind geotextile is made by means of interlacing artificial fibers—most often polypropylene—into a tough, planar fabric. Its excessive tensile power resists puncturing and tearing, making it best for load distribution. Unlike nonwoven fabrics, the woven model excels at separation: it continues the tender subgrade soil from intruding into the mixture base, stopping loss of thickness and preserving structural integrity. The most broadly used variant, woven polypropylene geotextile, gives high-quality chemical resistance, UV stability, and elongation properties. It does no longer rot or degrade in moist environments. Moreover, when top installed, it acts as a Drainage System Woven Geotextile by using permitting water to go laterally thru its aircraft whilst maintaining quality soil particles. This twin function—reinforcement plus drainage—is essential for roads constructed on clay, silt, or high-water-table sites. Typical purposes encompass unpaved get entry to roads, parking areas, railroad subbases, and transient development haul roads.
Step 1: Assess Site Conditions and Plan Materials
Every profitable stabilization mission starts offevolved with a thorough website online assessment. Begin by using checking out the subgrade: measure its California Bearing Ratio (CBR), moisture content, and plasticity. Soft clay or natural silt requires thicker combination cowl or a couple of layers of fabric. Next, habits a drainage survey to become aware of any herbal water waft paths. A Drainage System Woven Geotextile works great when water can exit the avenue structure, so layout for facet ditches or underdrains earlier than installation. Then specify your aggregate: use clean, angular beaten stone with a pinnacle dimension of two to 4 inches. Rounded or single-sized gravel shifts below load and reduces the effectiveness of the geotextile.
Order your woven kind geotextile in rolls that are broad adequate to decrease discipline seams; wellknown widths vary from twelve to eighteen feet. The particular woven polypropylene geotextile ought to meet challenge energy requirements, such as AASHTO M288 Class 2 or three Also buy staples or pins for anchoring. Finally, design the street sketch which includes length, width, and shoulder layback angles. Factor in overlaps of at least one foot and design for anchor trenches alongside the edges. Proper planning at this stage prevents high-priced transform later.
Step 2: Clear, Grade, and Compact the Subgrade
Proper subgrade training prevents material punctures and ensures uniform support. Start with the aid of clearing all vegetation, which includes grass, roots, and any rocks large than two inches. For forested areas, grub out stumps and fill the holes with compacted fill. Then function tough grading: reduce down excessive spots and fill low spots to create a smooth, barely topped floor with a slope of about one percentage towards the sides. Avoid abrupt transitions or sharp ridges. After grading, compact the subgrade with a smooth-drum vibratory curler for at least three passes. Soft areas may additionally require lime or cement stabilization before you vicinity any fabric. If the subgrade is moist from latest rain, wait for it to dry or installation brief diversion ditches. Remember, a Drainage System Woven Geotextile can cope with lateral drainage, however standing water at some stage in set up will purpose rutting and injury the fabric. Once graded and compacted, reinspect the floor for sharp objects. Even small rocks can puncture woven polypropylene geotextile below the weight of a heavy roller. For extraordinarily sharp subgrade, such as overwhelmed concrete debris, reflect onconsideration on spreading a one-inch sand cushion earlier than unrolling the geotextile.

Step 3: Unroll and Position the Woven Geotextile
With the subgrade ready, it is time to install the fabric. Unroll the woven kind geotextile alongside the road’s longitudinal axis, making sure that the more advantageous computer route (the roll length) aligns with the major site visitors direction. Where two rolls meet, overlap the edges by means of twelve to eighteen inches. Orient the overlap so that site visitors will “close” the seam—in different words, the upstream roll must lie on pinnacle of the downstream roll relative to the paving direction. Use panorama staples or sandbags each and every 5 to ten ft alongside the edges and overlaps to anchor the fabric. On slopes or windy sites, make bigger the frequency of anchoring. Keep the cloth taut but now not stretched; wrinkles or folds create susceptible factors the place mixture can penetrate unevenly. Use a sharp utility knife to reduce woven polypropylene geotextile cleanly, as frayed edges decrease the effectiveness of overlaps. For extensive roads, subject seaming may also be required. You can sew or heat-bond overlaps, however for most stabilization tasks a easy eighteen-inch overlap with staking works well. If the street consists of facet drains, prolong the cloth into the trench and then fold it back, turning the geotextile into a Drainage System Woven Geotextile that wraps the perforated pipe or gravel envelope.
Step 4: Create Seams and Prepare Edges
Proper seaming prevents separation at some stage in mixture dumping and compaction. For overlaps of woven kind geotextile, make certain that no dirt or mud is trapped between the layers; brush the surfaces smooth if necessary. You can sew the overlap with polypropylene thread the use of a stitching machine—though timeconsuming, this creates a monolithic sheet. For most unpaved roads, an overlap of eighteen inches with staple reinforcement each and every two ft is sufficient. After seaming, put together the edges with the aid of excavating a shallow anchor trench about six inches deep and six inches broad alongside each facets of the avenue alignment. Tuck the extra cloth into the trench and backfill it with soil or gravel. This anchors the woven polypropylene geotextile and prevents it from being pulled up through tire traction. If your sketch accommodates a Drainage System Woven Geotextile, excavate aspect ditches deeper—twelve to eighteen inches deep. Place the geotextile so that it strains the backside and aspects of the trench, then add a perforated drain pipe and cowl with smooth stone. The cloth maintains silt out of the pipe whilst permitting water to seep through. This built-in drainage strategy dramatically improves base life, mainly in wet climates or on roads with a excessive water table.

Step 5: Dump and Spread the Base Aggregate
Fabric placement is solely half of the job. The way you dump and unfold mixture determines whether or not the woven kind geotextile performs as intended. Always unfold the first carry of granular base fabric to a thickness of at least six to eight inches immediately over the fabric. Thinner lifts hazard puncturing the geotextile beneath heavy equipment. Do no longer dump combination without delay from a excessive truck tailgate onto naked fabric, due to the fact the have an effect on can rupture woven polypropylene geotextile. Instead, use a low-dump approach by using backing the truck up whilst dumping, or use a belt feeder. Alternatively, region a four-inch sacrificial pad of mixture at the dump spot first, then dump the predominant load onto that pad. Spread the combination the usage of a bulldozer or grader with rubber tracks to keep away from tearing the fabric. Avoid sharp turns or spinning tracks. A Drainage System Woven Geotextile advantages from uniform insurance barring any gaps at the edges. After spreading the first lift, compact it with a vibratory curler the use of mild passes initially. Then add subsequent lifts, every eight to ten inches thick, till you attain the plan thickness—typically twelve to twenty-four inches for heavy roads. Compact every raise to ninety-five percentage Standard Proctor density. During compaction, water will squeeze laterally thru the fabric; this is normal, as the woven kind geotextile acts as a drainage layer that prevents pore stress buildup.
Step 6: Perform Quality Control During Installation
To make certain long-term performance, test countless factors constantly as you work. First, confirm that no material wrinkles stay after spreading the first combination lift; look into uncovered edges and elevate the cloth to re-tension if wished earlier than covering. Second, stroll the complete size to seem for punctures. Small holes much less than one inch can be patched with a geotextile rectangular and adhesive, whilst larger tears require changing that area of the roll. Third, test overlap integrity in the course of dumping; if any seam opens, re-staple it immediately. Fourth, backfill anchor trenches proper after combination placement to forestall wind uplift. Keep a log of woven polypropylene geotextile roll numbers, set up dates, and any area modifications; this documentation helps with guarantee claims or future repairs. If your web page consists of a Drainage System Woven Geotextile in aspect trenches, affirm that the perforated pipe stays free of particles all through backfilling. The material masking have to wrap the pipe through at least one hundred eighty degrees, with the ends open to daylight hours or a trap basin.

Step 7: Avoid Common Mistakes
Even skilled crews can make blunders when putting in woven kind geotextile. One frequent mistake is dumping combination at once from a excessive dump truck onto naked fabric, which reasons punctures. To keep away from this, constantly use a low dump approach or region a sacrificial sand pad. Another regularly occurring error is ignoring gentle subgrade spots; these need to be stabilized with lime, cement, or a thicker geotextile earlier than material placement. Overlaps shorter than twelve inches are additionally problematic—maintain an eighteen-inch overlap on tender ground. Using nonwoven material for heavy hundreds is a mistake; constantly specify woven polypropylene geotextile for reinforcement. Sealing the material absolutely at the edges prevents aspect drainage, so rather use a Drainage System Woven Geotextile layout with trenches. Finally, compacting with sharpedged metal drums on uncovered cloth can tear the material; begin with a mild rubber tired curler and add cowl mixture earlier than the use of heavy metal drums. By averting these pitfalls, your avenue base will outperform unreinforced sections by means of a component of three to 5 in carrier life.
Step 8: Maintain the Road Base After Installation
After the street is opened to traffic, periodic upkeep ensures the woven kind geotextile continues to function. Perform a month-to-month inspection to seem for part raveling, rutting, or depressions. Surface cracks regularly point out subgrade motion beneath the fabric. Check that aspect ditches are clear of sediment and vegetation. If a Drainage System Woven Geotextile was once installed, investigate the outlet pipes for any blockage. Lightly grade the avenue floor each and every two to three years to fix the crown, however do no longer blade deeper than the pinnacle two inches, as deeper blading can reduce the woven polypropylene geotextile. If a part fails, reduce out the broken area, lay sparkling geotextile with an eighteeninch overlap, and backfill with new aggregate. Over the lengthy term, the Drainage System Woven Geotextile will forestall capillary upward jab and hold the base dry, decreasing frost heave and extending the road’s life. Many roads stabilized with woven kind geotextile have passed thirty years of carrier with minimal maintenance.

Conclusion
Installing woven kind geotextile for avenue base stabilization is a simple however detail-sensitive process. From grading and unrolling to seaming and compaction, every step ensures that your woven polypropylene geotextile grants most reinforcement. When facet drainage is needed, integrating a Drainage System Woven Geotextile into the edges or trenches continues the whole shape dry and resilient. By following this step-by-step information and warding off frequent mistakes, you will construct a avenue base that resists rutting, separates subgrade from aggregate, and stands up to heavy site visitors for years. Whether you are a contractor, an engineer, or a property owner, studying geotextile set up is an funding in lasting infrastructure.