How to Install a Geotextile Fabric Correctly: A Step-by-Step Guide
When embarking on a building or landscaping project, the distinction between a shape that lasts for many years and one that fails in a few years regularly lies in what can't be seen. Hidden under the surface of secure driveways, fine drainage systems, and erosion-resistant slopes is a silent workhorse: geotextile fabric.
This geo fabric fabric is engineered to separate, filter, reinforce, and drain. However, even the best exceptional cloth will underperform if set up incorrectly. A wrinkled, torn, or improperly secured layer can lead to soil migration, clogged drainage, and structural failure.
Whether you are laying a new driveway, constructing a keeping wall, or putting in a French drain, this step-by-step information will stroll you via the system of putting in geotextile material efficiently to make sure your assignment stands the check of time.

1. Understanding Geotextile Fabric and Its Functions
Before you unroll the first roll, it is fundamental to recognize what geotextile material does and which kind you want for your unique utility .
Separation: The major feature is to forestall distinct layers of soil (like subgrade and aggregate) from mixing. For example, the usage of geotextile material for driveway tasks ensures that the sharp gravel does now not punch down into the gentle clay below, preserving the thickness and power of the base layer .
Filtration: Often referred to as geo filter fabric, this cloth lets in water to omit thru whilst protecting soil particles. This prevents clogging in drainage systems.
Reinforcement: Woven fabric add tensile power to soils, permitting them to endure heavier hundreds .
Choosing the Right Type
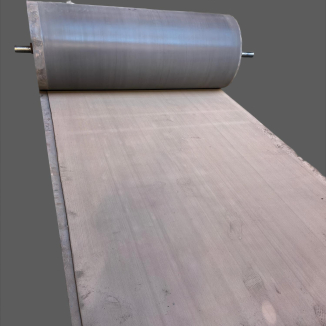
Woven Geotextile: Looks like burlap. It has excessive tensile electricity and is perfect for reinforcement and stabilization projects, such as driveways and roads .
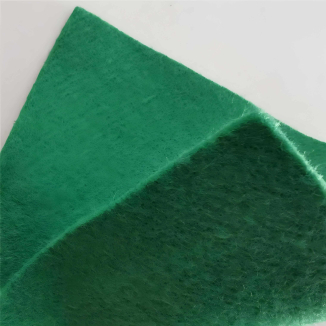
Non-Woven Geotextile: Feels like felt. It is amazing for filtration, drainage, and protection, making it the go-to preference for French drains and as a cushion between layers .
2. Pre-Installation Preparation: Site and Materials
Proper set up starts offevolved lengthy earlier than the cloth touches the ground. Preparation is the key to stopping punctures and making sure the material bonds properly with the website .
Clear and Grade the Surface
The floor onto which you will lay the geo material fabric need to be easy and free of debris. Remove all vegetation, sharp rocks, roots, and development debris. Even a small stone can create a tear beneath heavy load . If the subgrade is very tender or loose, reflect onconsideration on rolling it with a compactor to create a firm, secure platform .
Gather the Right Tools
You will want the geo filter cloth rolls, a sharp utility knife or geotextile scissors, panorama staples or anchor pins, a measuring tape, and a rake.

3. Step 1: Measure, Cut, and Position the Fabric
Rolling Out the Fabric
Begin with the aid of positioning the roll at one give up of your organized area. It is normally endorsed to location the cloth in direct contact with the soil below, beginning from the downstream area and transferring upstream if water drift is a element . Unroll the cloth slowly, making sure it lies flat towards the ground.
Cutting to Size
Cut the cloth the use of a sharp utility knife. When measuring, constantly add more size to account for overlaps. For most applications, you need to permit for a 6 to 12-inch overlap between adjoining rolls to make certain non-stop insurance . For high-load areas or tasks certain by using engineers, overlaps may additionally want to be as a lot as two ft .
Eliminate Wrinkles
Wrinkles are the enemy of geotextile installation. They create pockets the place mixture can shift inconsistently and reason the material to stretch or tear. Smooth out all wrinkles and waves as you go .
4. Step 2: Securing the Fabric in Place
Once the cloth is laid flat and smooth, it have to be secured to forestall motion all through the backfilling process.
Anchoring
Use panorama staples or steel anchor pins to repair the material to the ground. Place them alongside the edges and at the seams. In windy conditions, anchor one quit first and work your way down to forestall the cloth from billowing . For large, flat areas like these the use of geotextile cloth for driveway bases, spacing pins 1 to three toes aside is normally sufficient.
Managing Seams and Overlaps
The overlaps are the most prone phase of any installation.
For preferred applications, a easy shingle-lap overlap of at least 12 inches is required .
For initiatives involving water waft (like under-stream liners), the upstream roll have to overlap the downstream roll, comparable to roof shingles, so water flows over the seam as an alternative than catching it .
If the challenge needs excessive strength, the seams may also want to be stitched together. If sewing, make sure you use UV-stabilized thread—never nylon, as it degrades rapidly .

5. Step 3: Placing the Cover Material
With the geo cloth cloth anchored and smooth, the subsequent step is to cowl it with combination or soil. This is the most necessary section for stopping damage.
The "No-Drive" Rule
Construction motors and gear must in no way pressure without delay on the uncovered geotextile . The tires can snatch the fabric, wrinkle it, or push it out of position. Instead, mixture must be positioned the use of the "end-dump" method, working from the edges inward.
Spreading the Aggregate
Dump the first load of gravel or base fabric at the part of the material and push it ahead over the fabric, as a substitute than riding onto the material itself .
For fashionable soil, a minimal of 6 inches of mixture must be positioned earlier than any mild automobiles omit over it .
For vulnerable or saturated soils, the preliminary carry of mixture may additionally need to be 12 to 18 inches thick to create a steady working platform .
Spread the fabric evenly with a bulldozer or grader, working from the core outward to hold anxiety on the geotextile .
6. Step 4: Final Compaction and Inspection
Once the preliminary layer of mixture is spread, it is time to compact it. This locks the cloth in location and creates a inflexible base.
Compaction
Use a vibratory curler or plate compactor to densify the aggregate. This procedure forces the stone into a interlocking matrix and ensures full contact between the fabric, soil, and stone.
Final Inspection
Conduct a last walk-around. Check the edges to make certain the material is wholly buried and that no wrinkles fashioned for the duration of the dumping process. If any tears or harm are spotted, they need to be repaired immediately. Cut a patch of the equal geotextile cloth that extends at least three ft past the broken vicinity on all facets and vicinity it over the tear .

7. Common Mistakes to Avoid
Even skilled contractors can fall into these traps. Avoid them to make certain your set up is successful.
Using the Wrong Fabric
Using a woven cloth the place drainage is wanted (it can clog) or a non-woven cloth the place excessive tensile power is wanted (it can also stretch too much) is a frequent error. Ensure your geo filter cloth suits the hydraulic wants of the soil .
Insufficient Overlap
Skimping on overlap width is a false economy. As the floor settles or tools passes over, seams can pull aside if they are too narrow. Always adhere to the minimal 12-inch rule, and amplify it to two ft for gentle subgrades .
Exposing Fabric to Sunlight
Most geotextiles are degraded with the aid of Ultraviolet (UV) light. If the material sits uncovered for extra than a week (or as distinct by way of the manufacturer) earlier than being covered, it can lose considerable power . Always cowl your cloth promptly.
Creating Wrinkles
Wrinkles lead to stress factors and can reason the mixture layer above to be uneven. Take the time to pull the material taut .
8. Special Considerations for Specific Applications
While the ideas above are universal, exceptional tasks have barely distinctive nuances.
For Driveways (Using Geotextile Fabric for Driveway)
When reinforcing a driveway, the foremost intention is separation and stabilization . After putting in the fabric, make certain the base combination is angular (crushed stone) alternatively than round. Angular stone locks together, developing a sturdy interlock with the material to unfold the load of automobiles . This prevents rutting and potholes.
For Drainage (Using Geo Filter Fabric)
When lining a trench for a French drain, the material ought to wrap the whole pipe and the surrounding gravel envelope. This creates a "sock" that prevents fantastic silt from coming into the drain and clogging it, whilst nonetheless permitting water to pass by thru to the pipe .
For Slopes and Erosion Control
On slopes, lay the material parallel to the route of water drift (vertically up/down the slope) as a substitute than horizontally. This approves water to run down the slope besides catching the cloth edges and pulling them up. Anchor the pinnacle of the slope very securely earlier than unrolling down .

Conclusion
Installing geotextile cloth successfully is a easy method that will pay good sized dividends in the toughness of your project. By taking the time to accurate put together the site, deciding on the proper material, making sure flat placement with ample overlaps, and cautiously putting the cowl aggregate, you create a hidden basis that actively works to hold your structure.
Whether you are stabilizing a heavy-traffic vicinity with geotextile material for driveway reinforcement or defending a waterway with geo filter fabric, the guidelines stay the same: maintain it smooth, invulnerable the seams, and cowl it up. This geo cloth fabric is designed to be forgotten, working silently below the floor to preserve the floor secure and the water flowing the place it should.
Contact Us
Company Name: Shandong Chuangwei New Materials Co., LTD
Contact Person :Jaden Sylvan
Contact Number :+86 19305485668
WhatsApp:+86 19305485668
Enterprise Email: cggeosynthetics@gmail.com
Enterprise Address: Entrepreneurship Park, Dayue District, Tai 'an City,
Shandong Province