Installation Steps for Geomat to Ensure Maximum Performance
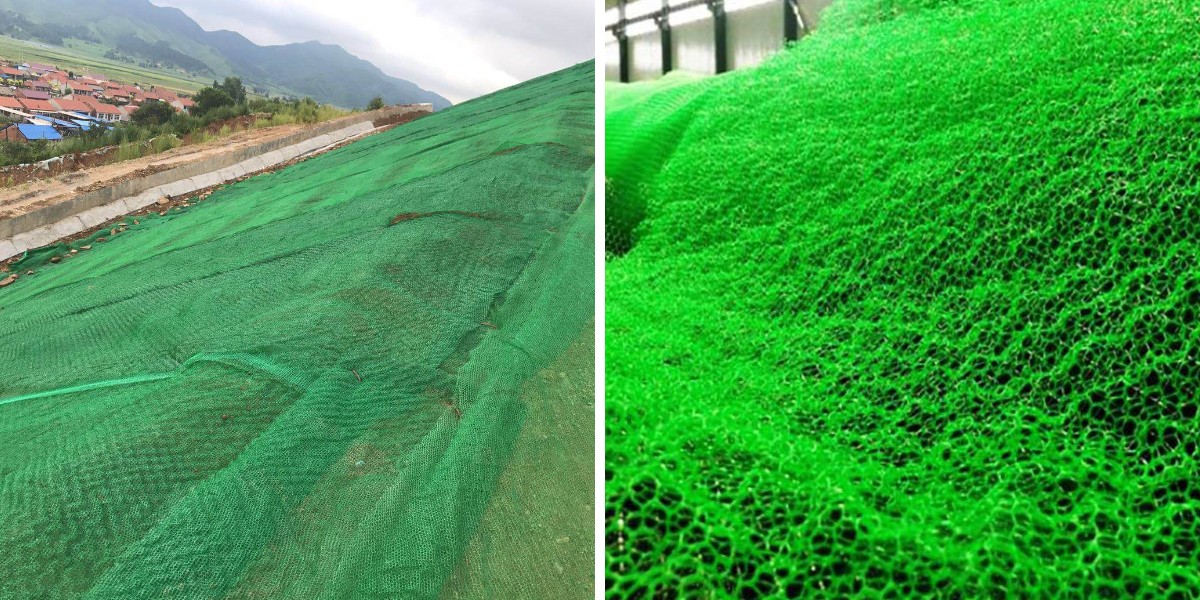
Geomat, along with specialised alternatives like Lay 3D vegetation internet and 3D geonet, performs a pivotal position in erosion control, slope stabilization, and ecological restoration in civil engineering projects. However, even the highest-quality geomat will fail to supply effects barring suited installation. A poorly mounted geomat can lead to untimely failure, elevated upkeep costs, and environmental risks—such as soil erosion or vegetation loss. This information breaks down the vital steps to installation geomat—from web site instruction to ultimate inspection—ensuring it performs at its peak. Each step emphasizes exceptional practices for 3D geonet and Lay 3D vegetation net, two broadly used editions in current projects.
1. Site Assessment and Preparation: Lay the Groundwork
Before unrolling a single sheet of geomat, a thorough website online evaluation is imperative to become aware of practicable challenges and tailor the set up manner accordingly. Start via evaluating the terrain: use a slope meter to measure inclines, as slopes over 30° might also require extra anchoring or strengthened geomat types. Check for unfastened soil layers (e.g., sandy or silty soil) that may want to shift beneath the geomat, and observe present vegetation—dense roots or tall weeds can create gaps between the geomat and soil, decreasing its effectiveness.
Clear the Surface: Use a rake or brush cutter to do away with debris, rocks large than 5 cm, and dense vegetation. For slopes susceptible to erosion, gently grade the soil with a mini-excavator or hand equipment to create a smooth, uniform floor with a 2–3% slope (for drainage). This step prevents punctures in the geomat—especially crucial for 3D geonet, whose inflexible mesh can tear if pressed towards sharp rocks. Ensuring full contact with the floor additionally maximizes the geomat’s potential to distribute stress evenly.
Address Drainage: Conduct a water glide check by means of sprinkling water on the slope to pick out pooling areas. If water accumulates, dig shallow trenches (10–15 cm deep and 20 cm wide) alongside the contour strains to redirect runoff towards distinct drainage channels. Line these trenches with gravel (5–10 mm) to forestall soil from clogging them. This step is vital for 3D geonet, which depends on unobstructed water drift thru its honeycomb shape to preserve soil stability. Poor drainage can entice water under the geomat, growing stress and inflicting slippage.
Test Soil pH: For initiatives the use of Lay 3D vegetation internet (designed to guide plant growth), acquire soil samples from 5–10 cm depth and take a look at pH ranges (ideal range: 6.0–7.5 for most grasses). Amend acidic soil with agricultural lime (2–5 kg per rectangular meter) or alkaline soil with sulfur (1–3 kg per rectangular meter) to optimize conditions. Add 2–3 cm of compost to nutrient-poor soil to promote vegetation establishment, as wholesome roots will intertwine with the net, reinforcing its preserve on the slope over time.
2. Selecting the Right Geomat Type: Match to Project Needs
Not all geomats are created equal, and deciding on the incorrect kind can undermine even the most cautious installation. Consider venture goals, soil type, and environmental stipulations to choose between 3D geonet, Lay 3D vegetation net, or different variants.
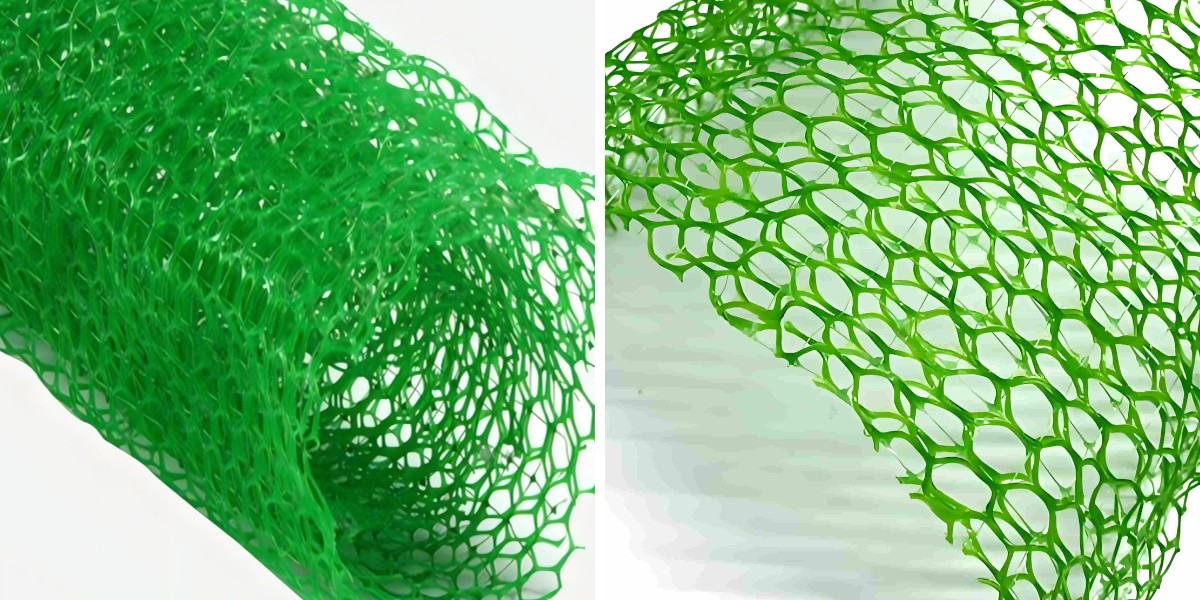
3D Geonet: This rigid, third-dimensional mesh—typically made from high-density polyethylene (HDPE)—features a honeycomb shape with 10–50 mm thick cells. Opt for it in functions requiring sturdy drainage and slope reinforcement, such as avenue embankments, landfill covers, or industrial website online stabilization. Its format traps soil particles whilst permitting water to drift freely, making it best for high-stress zones with heavy rainfall or regularly occurring water runoff. For example, in dual carriageway construction, 3D geonet hooked up on 25° embankments has decreased erosion with the aid of up to 70% in contrast to typical methods.
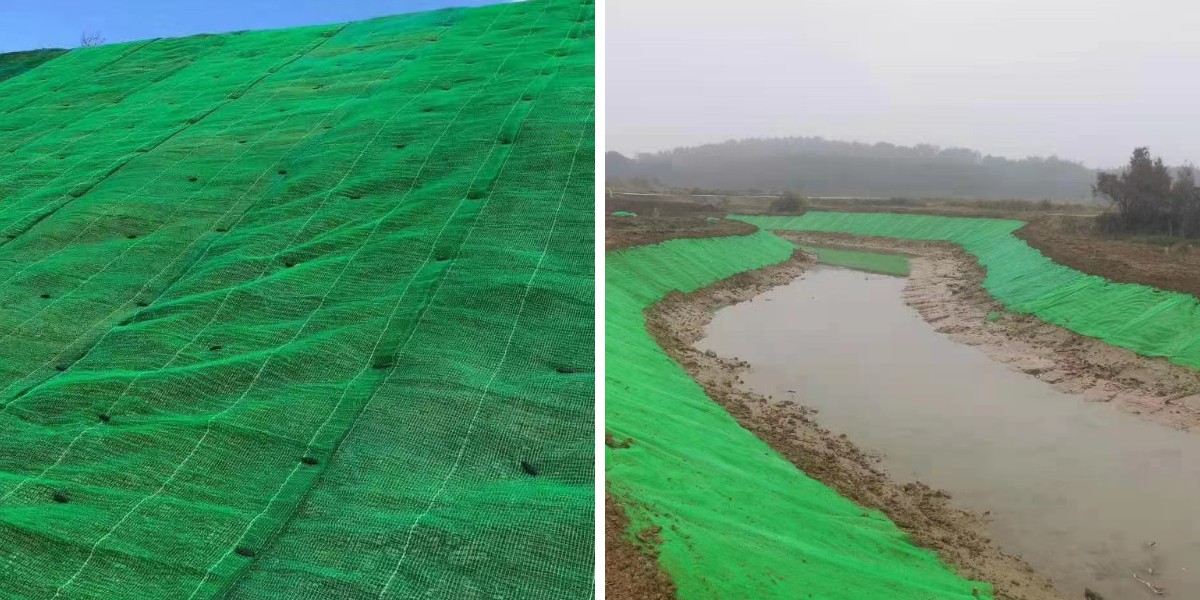
Lay 3D Vegetation Net: This semi-permeable, regularly biodegradable (e.g., coir or jute) or artificial netting is designed to help grass, shrubs, or wildflowers. Use it in ecological restoration, riverbank protection, or inexperienced slope tasks the place vegetation is key to long-term stability. The internet retains moisture, protects seeds from wind and water erosion, and courses root boom into a dense mat. A case find out about in riverbank restoration observed that Lay 3D vegetation internet multiplied seed germination fees by means of 40% in contrast to uncovered soil.
Check Specifications: Verify the geomat’s thickness (10–50 mm) and tensile energy (3–10 kN/m) towards assignment requirements. Steep slopes (>25°) want greater tensile electricity (8–10 kN/m) to withstand sliding, whilst flat areas can use lighter editions (3–5 kN/m). For 3D geonet, make certain cellphone measurement (5–20 mm) fits soil particle size—smaller cells for first-rate silt, large cells for sandy soil—to forestall clogging.
3. Unrolling and Positioning: Ensure Proper Alignment
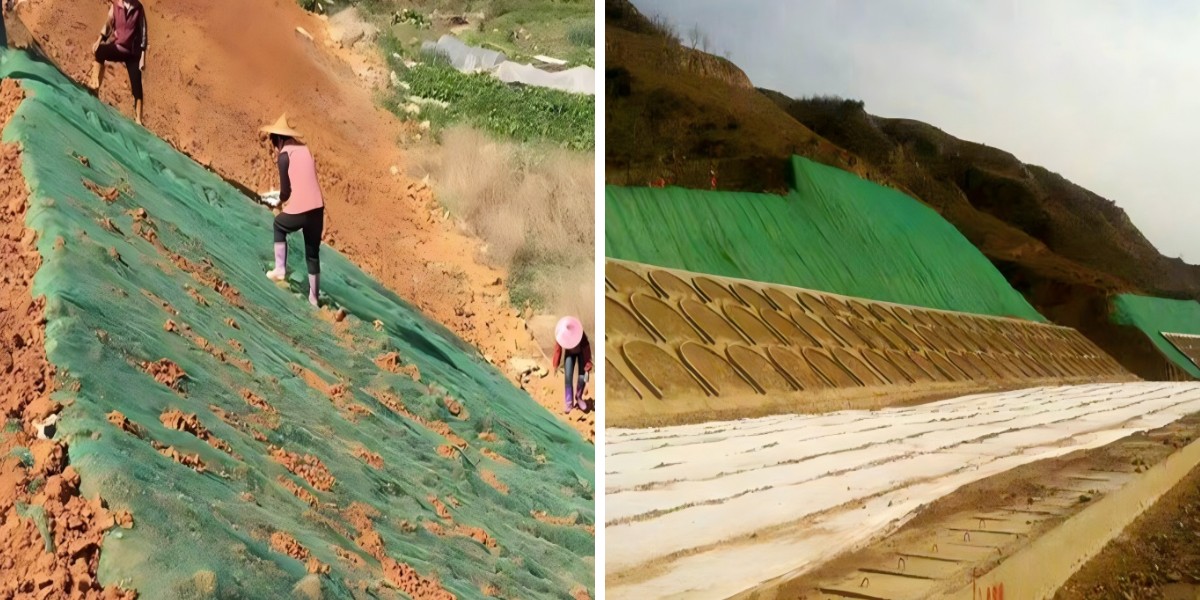
Proper unrolling and positioning forestall wrinkles, gaps, or overlaps that compromise the geomat’s capacity to distribute stress and manage erosion. Follow these steps for how to set up 3D vegetation internet and 3D geonet effectively:
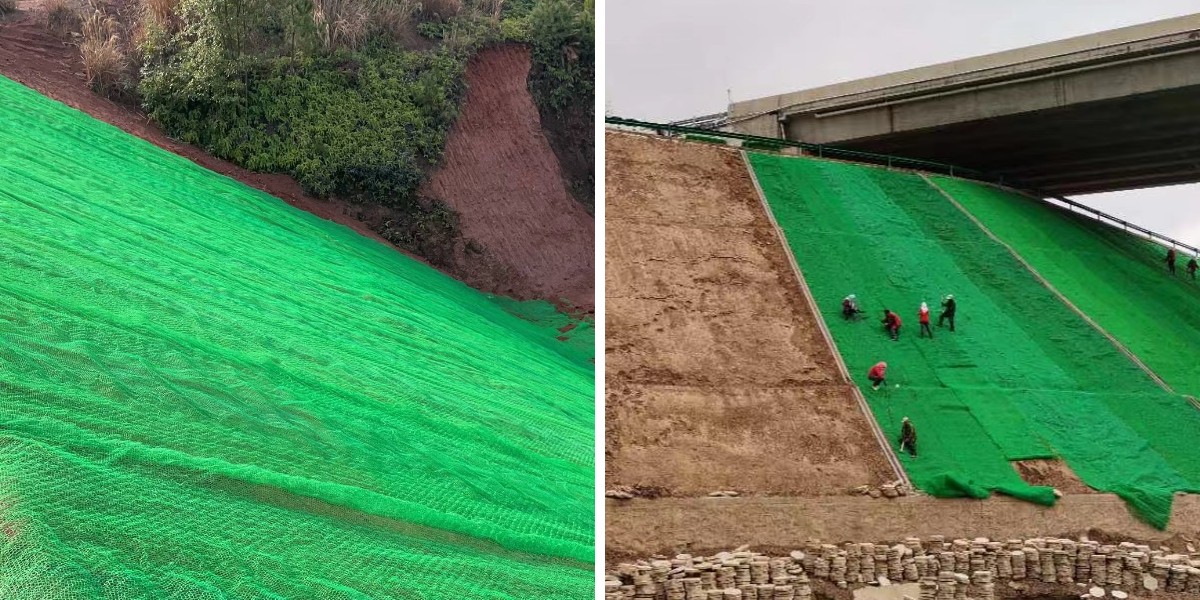
Unroll Parallel to Slopes: For sloped sites, unroll geomat from the pinnacle of the slope downward, preserving it parallel to the contour lines. This minimizes stress on the material, as perpendicular unrolling can create anxiety that leads to tearing. Use a rope or string line as a information to make certain straight alignment. For flat areas (e.g., landfill covers), align rolls with the course of water go with the flow to decorate drainage via 3D geonet or Lay 3D vegetation net.
Overlap Edges: Leave a 15–30 cm overlap between adjoining geomat sheets—wider overlaps (25–30 cm) on slopes to account for workable shifting. For 3D geonet, tightly closed overlaps with UV-stabilized plastic clips or stainless-steel staples (10–15 cm long), spaced 20 cm aside alongside the seam. For Lay 3D vegetation net, overlap edges via 20 cm and pin them with biodegradable timber stakes (30 cm long) to keep away from separation as flowers develop and soil settles.
Avoid Stretching: Pull the geomat taut by means of strolling backward whilst unrolling, however keep away from overstretching—this can weaken its tensile electricity with the aid of up to 20%. Use a hand curler (20–30 kg) to clean out wrinkles on large, flat areas, making sure full contact with the soil. For slopes, use a brush to press the geomat into contours, specifically round rocks or small depressions.
4. Anchoring: Secure Geomat Against Movement
Anchoring is essential to stop geomat from transferring due to wind, heavy rain, or soil movement—even minor shifts can create gaps that enable erosion to start. The approach relies upon on the geomat type, terrain, and neighborhood climate prerequisites (e.g., excessive winds or established storms).
Stakes for 3D Vegetation Net: Use 20–30 cm lengthy biodegradable timber or cornstarch-based plastic stakes, which won’t damage vegetation as they decompose. Drive stakes via the geomat at 50–100 cm intervals alongside edges and overlaps; for slopes steeper than 25°, add greater stakes in a zigzag sample (every 30 cm) to improve stability. Taper the stake hints to 45° angles for simpler insertion, and power them till solely 5 cm stays above the internet to keep away from negative mowing tools later.
U-Shaped Pins for 3D Geonet: In high-stress areas (e.g., avenue cuts or steep slopes), tightly closed 3D geonet with galvanized metal U-shaped pins (10–15 cm long, 5 mm diameter). Space pins 30–50 cm aside alongside edges and 1–2 meters aside in the center. For very steep slopes (>35°), mix pins with anchor trenches: dig a 20 cm deep, 30 cm vast trench at the pinnacle of the slope, bury the pinnacle aspect of the geomat in the trench, backfill with compacted soil, and impenetrable with extra pins. This "trench anchor" technique reduces slippage by way of 60% in testing.
Check Tension: After anchoring, gently pull on the geomat at a number of points to make certain it’s secure—there ought to be no movement. Loose sections have to be re-staked immediately, as wind raise or water float can shortly make bigger gaps. For 3D geonet, test that pins 穿透 each layers of overlapping mesh to forestall separation.
5. Final Inspection and Post-Installation Care
A thorough inspection and ongoing protection make sure the geomat continues to operate over its lifespan (typically 5–15 years, relying on type).
Inspect for Gaps or Damage: Walk the whole set up area, paying shut interest to overlaps, anchor points, and areas close to drainage trenches. Use a guidelines to be aware gaps large than 5 cm, torn edges, or lacking stakes. Repair small tears (less than 10 cm) with geotextile tape (UV-resistant, 10 cm wide), making use of it to each facets of the tear. Replace severely broken sections (tears over 30 cm) to keep away from erosion hotspots.
Vegetation Establishment (for 3D Vegetation Net): If the usage of Lay 3D vegetation net, broadcast grass or shrub seeds (e.g., ryegrass for rapid coverage, shrubs like willow for long-term stability) over the cloth inside forty eight hours of installation—delaying seeding can expose the internet to UV damage. Use a seed spreader for even distribution (20–30 grams per rectangular meter), then gently cowl seeds with topsoil (5–10 mm) or straw mulch (1–2 cm deep) to maintain moisture. Water gently with a sprinkler (avoid excessive pressure, which can dislodge seeds) each 2–3 days till germination (typically 7–14 days). The internet protects seeds from erosion whilst they take root, and as soon as vegetation is hooked up (4–6 weeks), the internet biodegrades or integrates into the root mat.
Monitor Drainage: For 3D geonet installations, take a look at drainage channels after heavy rain (over 25 mm in 24 hours) to make sure water flows freely thru the mesh. Clear any particles (e.g., leaves, silt) that clogs the pores the use of a rake or high-pressure hose. Blocked drainage can extend soil strain below the geomat, main to bulging or slippage—especially in clay soils, which drain slowly.
Conclusion
Proper set up is the key to unlocking geomat’s full manageable in erosion manipulate and slope stabilization. By following these steps—thorough website preparation, choosing the proper kind (like 3D geonet or Lay 3D vegetation net), unique positioning, tightly closed anchoring, and diligent post-installation care—you make certain most overall performance and longevity. Whether you’re tackling a motorway embankment, riverbank restoration, or landfill cover, gaining knowledge of how to installation 3D vegetation internet and different geomats ensures durability, cost-effectiveness, and long-term success for your civil engineering endeavors. Investing time in suited set up these days reduces upkeep expenses the next day and protects the surroundings for years to come.
Contact Us
Company Name: Shandong Chuangwei New Materials Co., LTD
Contact Person :Jaden Sylvan
Contact Number :+86 19305485668
WhatsApp:+86 19305485668
Enterprise Email: cggeosynthetics@gmail.com
Enterprise Address: Entrepreneurship Park, Dayue District, Tai 'an City,
Shandong Province


