DIY Geocell Projects: Step-by-Step Guide for Stabilizing Backyard Paths and Small Retaining Walls
Is your outside direction riddled with potholes after rain, or is your small keeping wall displaying symptoms of bulging and shifting? You don’t want to rent pricey contractors—geocell science makes these stabilization initiatives doable for DIY enthusiasts. Specifically, HDPE geocell (high-density polyethylene geocell) stands out as a durable, low-priced answer for reinforcing outside paths and small conserving walls. In this guide, we’ll smash down the whole lot you want to know, from deciding on the proper substances to executing every step flawlessly.
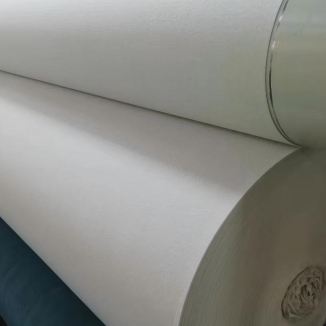
1. Why HDPE Geocell Is the Ultimate DIY Stabilization Material
Before diving into projects, it’s quintessential to recognize why HDPE geocell outperforms usual substances like gravel by myself or wood edging. Geocells are 3D honeycomb-like buildings that interlock to create a inflexible framework, distributing weight evenly and stopping soil erosion. When made from HDPE—a high-strength, UV-resistant plastic—they provide unmatched advantages for DIYers:
1.1 Durability That Withstands the Elements
HDPE geocell is engineered to withstand harsh weather, from sizzling summer season solar to freezing wintry weather temperatures. Unlike timber aspects that rot or metallic that rusts, HDPE geocell keeps its structural integrity for 20+ years with minimal maintenance. This sturdiness ability your DIY course or preserving wall won’t want universal repairs, saving you time and cash in the lengthy run.
1.2 Easy Installation for Beginners
Traditional stabilization strategies regularly require heavy equipment or specialised skills, however geocell is light-weight and flexible. HDPE geocells fold flat for transportation and increase without difficulty on-site—no heavy lifting required. Even if you’re new to DIY, you can bring together the honeycomb shape in minutes with fundamental tools.
1.3 Cost-Effective Compared to Professional Work
Hiring a contractor to stabilize a outside course can price $5–$10 per rectangular foot, whilst a small conserving wall might also run $20–$30 per rectangular foot. Using HDPE geocell cuts these charges by way of 50% or more. A 10x10-foot roll of HDPE geocell generally fees $50–$100, and you can pair it with less expensive fill substances like gravel or beaten stone.

2. Pre-DIY Prep: Gather Tools and Choose the Right Geocell
Success with DIY geocell initiatives starts offevolved with ideal preparation. You’ll want a few simple equipment and the proper geocell规格 (specifications) for your project.
2.1 Essential Tools for the Job
You probable already have most of these equipment in your garage: a measuring tape, backyard rake, shovel, wheelbarrow, tamper (manual or electric), utility knife (for slicing geocell), and stakes (to tightly closed the geocell). For large projects, an electric powered tamper (rented for $20–$30 per day) will retailer time on compacting fill material.
2.2 How to Select the Right HDPE Geocell
Geocells come in one-of-a-kind phone sizes (6–12 inches) and heights (2–6 inches). For outside paths, pick a 2–4 inch tall HDPE geocell with 8–10 inch cells—this balances steadiness and ease of filling. For small preserving partitions (3 ft or shorter), decide for 4–6 inch tall geocell with 6–8 inch cells to take care of the lateral stress of soil. Always test that the geocell is labeled “HDPE” to make certain UV resistance and durability.
2.3 Prep the Site Before Installation
Clear the location of weeds, rocks, and debris. For paths, dig a 3–4 inch deep trench (width matching your path) and rake the base flat. For preserving walls, mark the wall’s footprint with stakes and string, then dig a 6–8 inch deep trench (wider than the geocell by using 1 inch on every side) to create a steady base. Compact the trench base with a tamper to forestall settling.

3. Step-by-Step: Stabilize Your Backyard Path with Geocell
A geocell-stabilized route stays clean and weed-free, even after heavy foot site visitors or rain. Follow these steps for a professional-looking result:
3.1 Unfold and Secure the HDPE Geocell
Lay the folded HDPE geocell in the trench and unfold it to cowl the whole course width. Trim extra geocell with a utility knife to fit the direction length. Secure the geocell to the floor the usage of stakes (hammered via the geocell’s side into the trench base) each 2–3 feet—this prevents transferring throughout filling.
3.2 Fill the Cells with Aggregate
Use beaten stone (3/4 inch) or gravel as fill material—avoid sand, which can wash out. Shovel the combination into the geocell cells, filling them to the top. Rake the floor to make certain even coverage, and faucet the geocell edges gently with a shovel to settle the aggregate.
3.3 Compact and Finish the Path
Run a tamper over the stuffed geocell to compact the aggregate—this locks the fabric in area and creates a company surface. Add a 1-inch layer of high-quality gravel or ornamental stone (like river rock) on pinnacle for a polished look. Water the direction gently to settle the pinnacle layer, then let it dry for 24 hours earlier than use.

4. Build a Small Retaining Wall with HDPE Geocell
A HDPE geocell protecting wall is best for protecting returned soil in flower beds or sloped areas. It’s lighter than concrete blocks and simpler to regulate if needed.
4.1 Lay the First Course of Geocell
Place the first layer of HDPE geocell in the organized trench, unfolding it to the wall’s length. Secure it with stakes alongside the the front and returned edges. Fill the cells with overwhelmed stone, compacting absolutely with a tamper—this types the wall’s base and prevents sinking.
4.2 Stack Additional Layers
For every subsequent layer, shift the geocell returned 1–2 inches (this “battering” the wall prevents it from leaning forward). Unfold the geocell, invulnerable it to the layer under with zip ties (every 12 inches), and fill with aggregate. Compact every layer earlier than including the next. Continue stacking till the wall reaches your preferred peak (max three ft for DIY).
4.3 Backfill and Finish
Once the wall is complete, backfill the place in the back of it with a combine of soil and gravel (60/40 ratio) to enhance drainage. Compact the backfill in 6-inch layers to keep away from settling. Add a layer of mulch or ornamental stone alongside the wall’s base to conceal the trench and stop erosion.

5. Common DIY Geocell Mistakes to Avoid
Even with easy installation, small mistakes can compromise your project. Here are key pitfalls to steer clear of:
5.1 Skipping Compaction
Failing to compact the base or combination leads to settling. Always tamp the trench base and every layer of fill material—this is the most essential step for long-term stability.
5.2 Using the Wrong Fill Material
Sand or topsoil washes out of geocell cells, whilst outsized rocks depart gaps. Stick to 3/4 inch overwhelmed stone or gravel for the satisfactory results.
5.3 Neglecting Drainage
For keeping walls, add a 4-inch layer of gravel at the back of the wall earlier than backfilling with soil. This prevents water buildup, which can push the wall forward.

Final Thoughts: Transform Your Backyard with HDPE Geocell
Whether you’re fixing a bumpy course or constructing a small conserving wall, HDPE geocell makes DIY stabilization reachable and affordable. Its durability, convenient installation, and value financial savings beat typical techniques fingers down. By following this guide, you’ll create tasks that seem to be expert and stand the take a look at of time. Ready to get started? Grab your geocell, accumulate your tools, and flip your outdoor woes into wins!
Contact Us
Company Name: Shandong Chuangwei New Materials Co., LTD
Contact Person :Jaden Sylvan
Contact Number :+86 19305485668
WhatsApp:+86 19305485668
Enterprise Email: cggeosynthetics@gmail.com
Enterprise Address: Entrepreneurship Park, Dayue District, Tai 'an City,
Shandong Province