A Step-by-Step Guide to Installing Concrete Impregnated Fabric
From erosion manage in drainage ditches to structural repairs in culverts, the demand for durable, easy-to-install building substances is on the rise. Traditional concrete set up requires heavy equipment, formwork, and prolonged curing times—making it highly-priced and time-consuming for many projects. Concrete impregnated fabric, additionally recognised as a cement blanket, has emerged as a game-changing alternative. This flexible, ready-to-use cloth combines the energy of concrete with the comfort of fabric, simplifying installations for Ditch Lining, slope stabilization, and restore work. This information gives a detailed, step-by-step method to putting in concrete impregnated fabric, making sure profitable consequences for each DIY fans and expert contractors.

Understanding Concrete Impregnated Fabric: Key Benefits for Installation
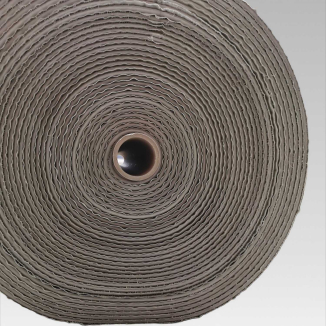
Concrete impregnated material is a composite fabric consisting of a woven or nonwoven cloth matrix infused with a dry, high-performance cement mix. When activated with water, it hydrates and hardens into a rigid, load-bearing structure—offering the equal energy as standard concrete however with unmatched flexibility at some point of installation. As a cement blanket, it comes in rolls, making it effortless to transport to far off websites or hard-to-reach areas. For Ditch Lining and erosion control, its capacity to conform to irregular surfaces ensures a tight, seamless match that prevents water seepage and soil erosion. Unlike moist concrete, it requires no mixing, formwork, or heavy machinery, reducing set up time via up to 70% whilst decreasing labor costs.
Pre-Installation Preparation: Setting the Stage for Success
Proper training is quintessential to maximizing the overall performance of concrete impregnated fabric. Skip these steps, and you danger weakening the last shape or compromising set up quality:
1. Assess the Project and Gather Materials
First, outline the venture scope: whether or not it’s Ditch Lining, a small keeping wall, or pipe repair. Measure the place to decide the quantity of concrete impregnated cloth needed—add 10–15% more to account for trimming or overlapping seams. Gather crucial tools: a utility knife or scissors for cutting, a sprayer or hose for water activation, panorama staples or anchor pins for securing, and a rake or broom for website online cleaning. For massive projects, reflect onconsideration on a curler to clean the cloth in the course of installation.
2. Site Cleaning and Preparation
Clear the set up place of debris, rocks, roots, and vegetation. Any sharp objects can puncture the cement blanket, so do away with or bury them. For Ditch Lining or slope projects, grade the floor to create a smooth, even base—fill in gullies or low spots with compacted soil to stop uneven settling. If the floor is uneven, lay a geotextile underlay to add an more layer of safety and enhance material adhesion.
3. Weather and Environmental Checks
Choose a day with moderate climate for installation—avoid intense temperatures (below 5°C or above 35°C), heavy rain, or excessive winds. Cold temperatures sluggish hydration, whilst warmness can motive the material to dry too quickly, main to cracks. Wind can make it hard to manage giant rolls of concrete impregnated fabric, so tightly closed the website with windbreaks if needed. Ensure the set up location is well-drained to stop water pooling throughout curing.

Step-by-Step Installation of Concrete Impregnated Fabric
Follow these sequential steps to deploy concrete impregnated material correctly, whether or not for Ditch Lining or different applications:
1. Unroll and Position the Fabric
Transport the cement blanket rolls to the set up web page and unroll them carefully. Align the material to cowl the goal area, making sure it extends at least 15–20 cm past the edges for tightly closed anchoring. For Ditch Lining, drape the cloth into the ditch, permitting it to conform to the ditch’s form besides stretching or wrinkling. If the use of a couple of rolls, overlap the seams through 10–15 cm to create a watertight bond—ensure the pinnacle roll overlaps the backside one to stop water from seeping beneath the seam.
2. Secure the Fabric in Place
Secure the concrete impregnated material to the floor the usage of panorama staples or anchor pins. Place staples each and every 30–40 cm alongside the edges and each and every 60 cm in the middle for stability. For slopes or vertical surfaces (like preserving walls), use longer anchor pins or drill holes for rebar stakes to forestall slippage. Ensure the material is taut however now not stretched—overstretching can weaken the fabric as soon as it hardens.

3. Activate the Fabric with Water
Activate the cement blanket via totally wetting it with water. Use a sprayer for uniform insurance or a hose with a first-class mist nozzle—avoid high-pressure streams that can displace the dry cement mix. Start from the pinnacle of the material and work your way down, making sure each and every area is saturated. The material will darken as it absorbs water; proceed wetting till the shade is regular throughout the complete surface. For thick material or giant rolls, enable water to soak in for 5–10 minutes, then re-wet to make certain full hydration.
4. Smooth and Shape the Fabric
While the concrete impregnated material is nevertheless moist and flexible, use a curler or broom to clean out wrinkles, air bubbles, or uneven areas. For Ditch Lining, press the material firmly into the corners and edges of the ditch to make sure full contact with the soil. If shaping the material into curves or angles (e.g., for pipe wraps), gently mould it into place—avoid folding or creasing, as this can create susceptible factors as soon as hardened.
5. Seal Seams and Edges
For overlapping seams, follow extra water to the overlap location to make certain the cement combine bonds between the layers. Use a curler to press the seams collectively firmly, casting off air gaps. For side protection, fold the extra cloth over the edges and tightly closed it with staples or cowl it with soil to forestall fraying. If the material is set up close to site visitors or foot traffic, add a layer of gravel or mulch round the edges to guard it for the duration of curing.

Post-Installation Curing and Maintenance
Proper curing ensures the concrete impregnated cloth reaches its full strength. Follow these tips for post-installation care:
1. Curing Process
Keep the material moist throughout the first 24–48 hours of curing. If the climate is warm or dry, mist the cloth with water each 4–6 hours to stop untimely drying. Avoid on foot on or putting heavy objects on the cloth at some point of curing—this can disrupt the hydration system and motive cracks. The material will harden inside 24 hours however reaches full electricity in 7–10 days.
2. Maintenance Checks
After curing, look into the cement blanket for cracks, tears, or unfastened seams. Small cracks can be repaired via wetting the location and making use of a patch of more fabric. For Ditch Lining, test the set up after heavy rain to make sure no water is seeping underneath the cloth or thru seams. Remove any particles that accumulates on the material to forestall clogging or damage.

Conclusion: Simplify Your Project with Concrete Impregnated Fabric
Concrete impregnated material transforms the way we method Ditch Lining, repairs, and stabilization projects. Its ease of installation, flexibility, and sturdiness make it a gold standard choice to standard concrete—saving time, labor, and costs. By following this step-by-step guide, you can make sure a profitable set up that grants long-lasting results, whether or not you’re a home owner tackling a outside drainage task or a contractor working on a business site.
As a cement blanket, it gives unmatched comfort besides sacrificing strength, making it best for a large vary of applications. From stopping erosion in ditches to repairing broken concrete structures, concrete impregnated cloth proves that development doesn’t have to be complicated. Invest in best fabric, comply with desirable instruction and set up steps, and experience a durable, low-maintenance answer that stands the check of time.
Contact Us
Company Name: Shandong Chuangwei New Materials Co., LTD
Contact Person :Jaden Sylvan
Contact Number :+86 19305485668
WhatsApp:+86 19305485668
Enterprise Email: cggeosynthetics@gmail.com
Enterprise Address: Entrepreneurship Park, Dayue District, Tai 'an City,
Shandong Province